
Star Wars Zero Company: Best Class for Hawks
Choose the best class for Hawks in Star Wars Zero Company: Scout for setup, Medic for recovery, Sharpshooter for range, with squad and respec checklists.
Quick answer
Choose Scout when your squad needs Advantage and setup, Medic when recovery is the bottleneck, or Sharpshooter when you lack reliable ranged damage. Build Hawks for the job your other Operators leave uncovered.
Scout is our flexible starting recommendation, not an official best-class ranking. Sources were checked on October 12, 2026; this Wiki has not independently benchmarked these builds.
On this page7 sections
The best class for Hawks in Star Wars Zero Company is usually Scout for setup, Medic for recovery, or Sharpshooter for a missing ranged role. Start by inspecting the other Operators you will actually deploy. An extra damage tree is less useful when the squad already has finishers but cannot prepare a safe turn.
Choose Hawks’ class by the squad gap
| What goes wrong in your missions? | Starting recommendation | What success should look like |
|---|---|---|
| Strong abilities are ready, but the squad cannot fund its setup | Scout | The intended teammate can use the important action without losing the whole turn plan |
| Damage is sufficient, but repeated downs disrupt the roster | Medic | A threatened Operator survives and the squad still advances the objective |
| Priority enemies survive because the squad cannot reach or shoot them | Sharpshooter | Hawks can attack that target from a useful position |
| You already have support and want a coordinated cleanup role | Gunslinger | Other Operators prepare targets that Hawks can finish efficiently |
The first three roles are also discussed in Jason Rodriguez’s hands-on Operator guide for Epic Games Store. The table’s mission-based priorities are our editorial recommendations; it does not establish a universal damage ranking.
Scout: prepare the team’s important action
Scout is our starting choice when the squad’s damage is already covered. EA’s Specialization overview describes its team-oriented preparation role, while Epic’s guide highlights Advantage generation.
Before moving Hawks, name the action you want another Operator to take. If Cly needs a shared-resource setup, reserve that budget before other ultimates consume it. If a target already dies to ordinary attacks, preserve the setup for a threat that actually needs it. A Scout turn succeeds when the squad completes a better plan, not simply when Hawks gains a personal damage number.
Medic: solve the survival problem first
Choose Medic when the squad can eliminate enemies but keeps arriving at The Den with an unhealthy roster. Spend the recovery action on the Operator whose survival protects the objective, then check whether Hawks still has an affordable assist, move or attack.
Do not select Medic only to chase unspecified Bond gains. Judge the build by avoided downs and continued mission progress. Use injury and recovery planning to decide when a healthy replacement is better than repeatedly taking the same injured favorite.
Sharpshooter or Gunslinger: fill a damage job
Pick Sharpshooter when the current map and roster leave a priority target without a reliable firing lane. Check the actual shot preview and AP cost before committing. Long range is useful only when the Operator has sight of the target and can still contribute to the objective.
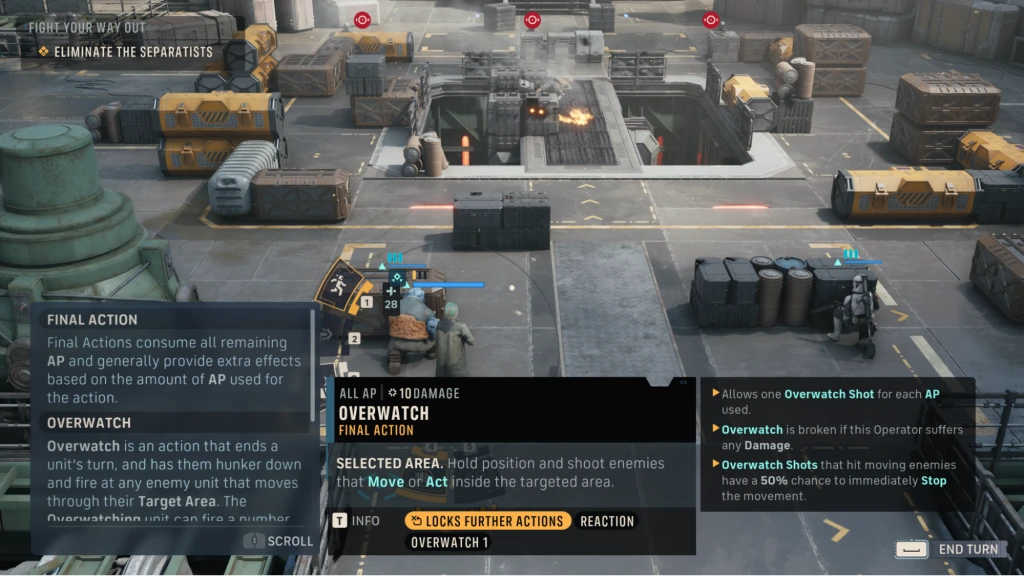
EA’s combat-interface example: compare position and the selected action before spending the turn. The image illustrates action planning; it does not show a tested Hawks loadout or prove a class’s damage.
Screenshot: EA Accessibility Resources · © EA / LucasfilmGunslinger is our alternative when teammates already provide support and can leave suitable cleanup targets. Plan the follow-up before spending Hawks’ actions. On a map that forces continuous movement or awkward sightlines, reassess the weapon and job instead of defending a favorite class label.
A first-build and respec checklist
- Inspect the next squad. Include mission requirements and injured Operators, not only your preferred four.
- Name the missing job. Setup, recovery or ranged damage gives you a concrete reason for the class choice.
- Fund that job first. Prioritize the first tree’s useful actions before spreading Focus across a hybrid.
- Check weapon costs and Utilities. A good class cannot rescue an unaffordable planned turn.
- Review one mission. Did Hawks solve the chosen problem? Change one priority if not, rather than buying more unrelated talents.
Epic’s guide describes talent refunds and later second Specializations. Use those options to adapt the commander in Personnel; check the available controls and unlocks in your current campaign. A Scout/Scoundrel, Medic/Heavy or Sharpshooter/Scout combination can be a later experiment, not a mandatory early shopping list.
Why the rest of the squad still matters
Epic identifies Fearless Leader as Hawks’ unique support talent. Separately, the developer Q&A confirms that Hawks is required on story missions. Both make a useful commander role valuable across the campaign, but neither proves Scout is always optimal.
Use the four-Operator squad planner and example squads to cover setup, damage, control and recovery. If a new recruit already covers Hawks’ current job, rebuild for the remaining gap.
Sources and review
Checked October 12, 2026: Epic’s first-hand Operator guide, EA’s Specialization overview and EA’s developer Q&A. The tactical illustration comes from EA’s accessibility resources. Role priorities, selection conditions and the checklist are our editorial synthesis; we have not independently playtested or benchmarked these loadouts.
More in Guides
Continue exploring
Related guides
Guides
Browse tactical help for Star Wars Zero Company, including beginner combat tips, classes, The Den upgrades, weapons, achievements, difficulty choices, and campaign priorities.
Beginner Guide
This Star Wars Zero Company guide explains Action Points, cover, Advantage, Bonds, The Den, squad building, missions, and the best early campaign priorities.
Classes & Specializations
Compare all Star Wars Zero Company classes, including eight standard Specializations, four locked paths, ideal squad roles, weapons, talents, and pairings.
The Den Upgrades
Plan Star Wars Zero Company The Den upgrades with verified facility rules, Build Slots, recovery, recruitment, weapons, Utilities, Intel, and Influence priorities.